How to Build a Leaf-Stuffed Cage for Fig Winter Protection
A leaf-stuffed cage is one of the most reliable, low-tech ways to protect fig trees through winter in Zone 7b and similar climates. When built correctly, it preserves multiple feet of live wood, buffers temperature swings, and avoids the moisture problems that cause rot and mold.
This guide walks through how to build a leaf-stuffed cage step by step, what materials work best, and the common mistakes that cause these systems to fail.
Why Leaf-Stuffed Cages Work So Well
Leaf-stuffed cages succeed because they insulate without sealing. Dry leaves trap air, which slows heat loss, while the cage structure prevents compaction and wind removal. At the same time, the system remains breathable, allowing moisture to escape rather than condense.
Unlike wrapped systems that rely on synthetic insulation alone, leaf cages create a stable micro-environment around the branches.
When a Leaf-Stuffed Cage Is the Right Choice
Leaf-stuffed cages are ideal for established in-ground fig trees where preserving branch length matters. They work especially well for multi-stem or bush-form figs that are difficult to wrap tightly without breakage.
They are less suitable for very small first-year trees or container figs that can be relocated instead of insulated.
Materials You’ll Need
A successful cage requires only a few components. Hardware cloth or welded wire fencing forms the structure. Zip ties or wire secure the cage. Dry leaves — preferably oak or mixed hardwood — provide insulation. A breathable outer wrap such as burlap may be used to keep leaves from blowing out.
Avoid plastic as an inner layer and avoid any material that traps moisture directly against branches.
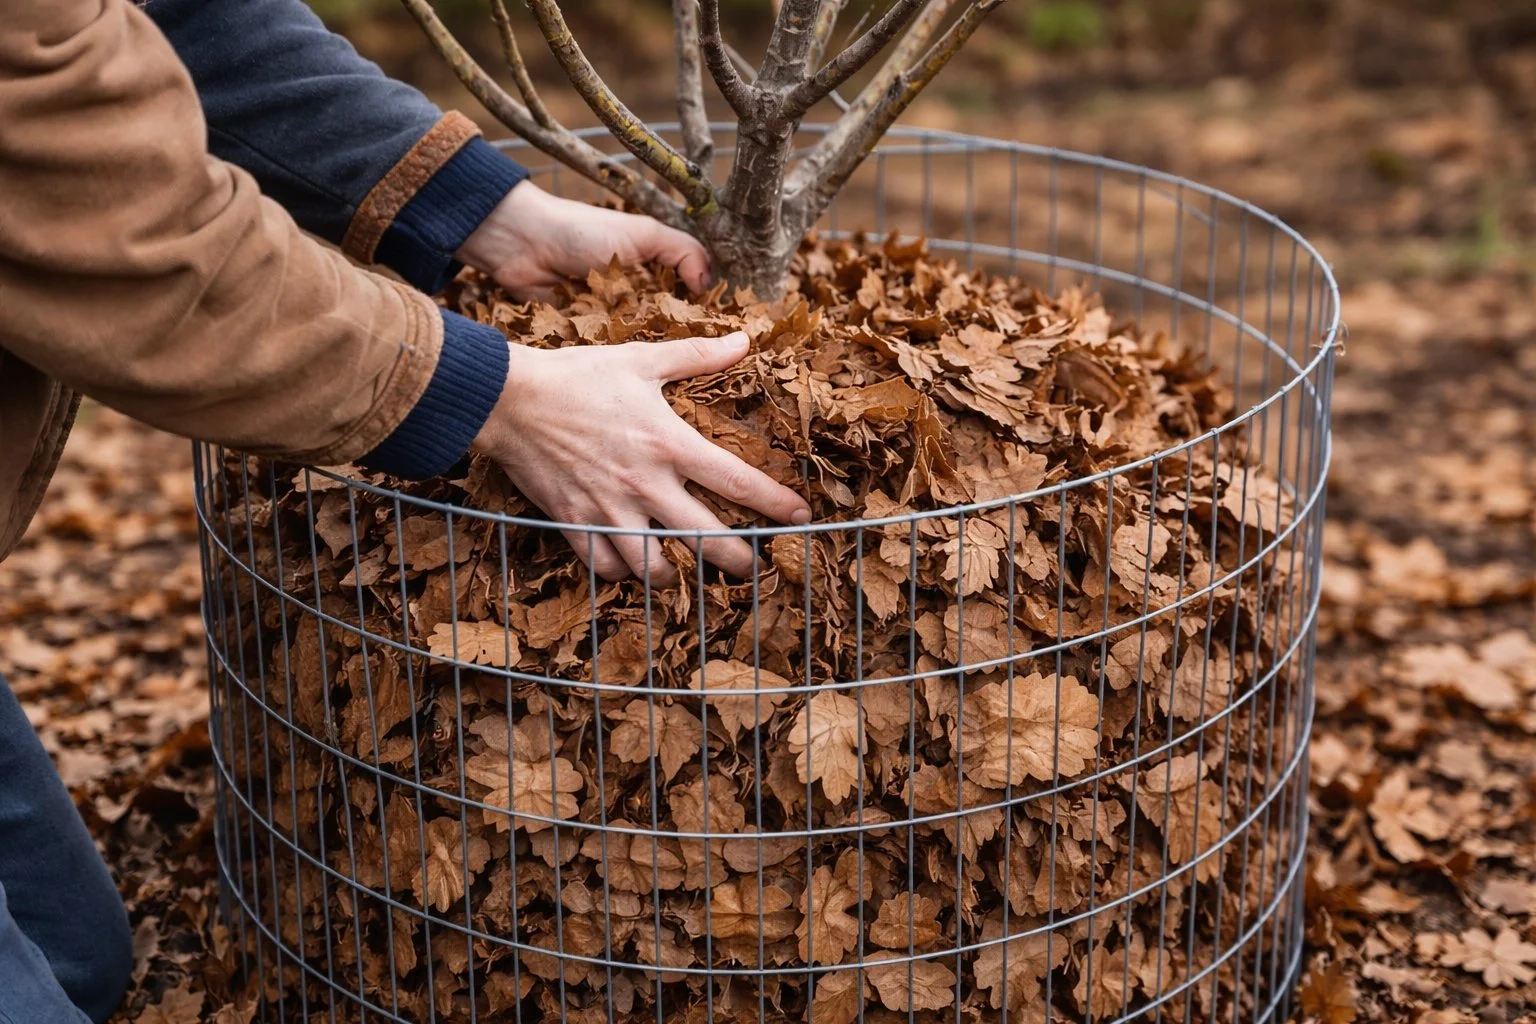
Step-by-Step: Building the Cage
Start by gently tying the fig branches inward if necessary to reduce the cage diameter. Leave space between branches to prevent rubbing and moisture buildup.
Form a cylinder of wire fencing around the tree, allowing several inches of clearance on all sides. Secure the cage firmly so it cannot collapse under wind or snow.
Once the cage is in place, fill it loosely with completely dry leaves. Do not pack or compress them. The goal is trapped air, not density. Fill the cage above the highest branch you want to protect.
If wind is an issue, wrap the outside of the cage with burlap or frost cloth, keeping the bottom open for airflow and drainage.
Leaf Selection Matters More Than You Think
Oak leaves are ideal because they resist matting and shed moisture. Maple and mixed hardwood leaves also work well. Avoid leaves that are wet, partially decomposed, or moldy.
Never use grass clippings, pine needles, or shredded mulch inside the cage — these compact and trap moisture.
Common Mistakes That Cause Cage Failure
The most common failure is installing the cage too early, before consistent cold arrives in Zone 7b. This traps warmth and moisture, encouraging rot. Another common issue is using wet leaves or packing them tightly, which eliminates airflow.
Cages that collapse or lean also fail by compressing insulation and exposing branches.
When to Open or Remove the Cage
Leaf-stuffed cages should remain in place until the risk of hard freezes has passed. Removing them too early exposes tender wood to late cold snaps.
In spring, remove the outer wrap first, then gradually open the cage to allow drying before fully removing the leaves.
The Takeaway
A properly built leaf-stuffed cage is one of the most dependable winter protection systems for figs in cold climates. When constructed with dry leaves, breathable materials, and correct timing, it can preserve significant branch length and dramatically improve spring recovery.
For a complete overview of cold-weather strategies, materials, and recovery techniques, see Winter Protection & Dieback Prevention for Fig Trees.